

Tuesday, January 31, 2012
New paintings for January 2012
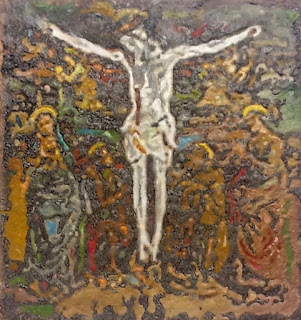
In Sedona, Arizona, I have continued the Meditations on the Holy Cross Series using watercolors mostly.
 Here is 120109 7" x 10" $150.00

Make a Heated Palette for Encaustics
For those who want to use a hot plate to heat a palette for encaustics the following is a simple and money saving solution.
First, a list of what you will need:
1 Maxi-Matic ESB-301F Elite Cuisine Single Cast Burner 1000-Watt Hot Plate, White
by Maxi-matic featuring
1000-Watt self-cleaning element
Adjustable temperature control
Chrome-plated drip pan
Cool-touch base
Product Dimensions: 3.6 x 9.2 x 10.6 inches
Elite by Maxi-Matic's powerful self-cleaning cast iron hot plate is perfect for cooking at school, office, or home. The 1000-watt will heat up quickly, and the cast iron heating element will ensure even cooking. Features include an adjustable temperature control, chrome-plated drip pan, and cool-touch base.

Note: The wood frame is shown upside down to view the adjustable carriage bolts.
1 Nordic Ware Bakers Quarter Sheet, 13 by 9 by 1 by Nordic Ware featuring:
Rust proof aluminum
Dishwasher safe
Encapsulated steel rims to prevent warping
Made in the USA

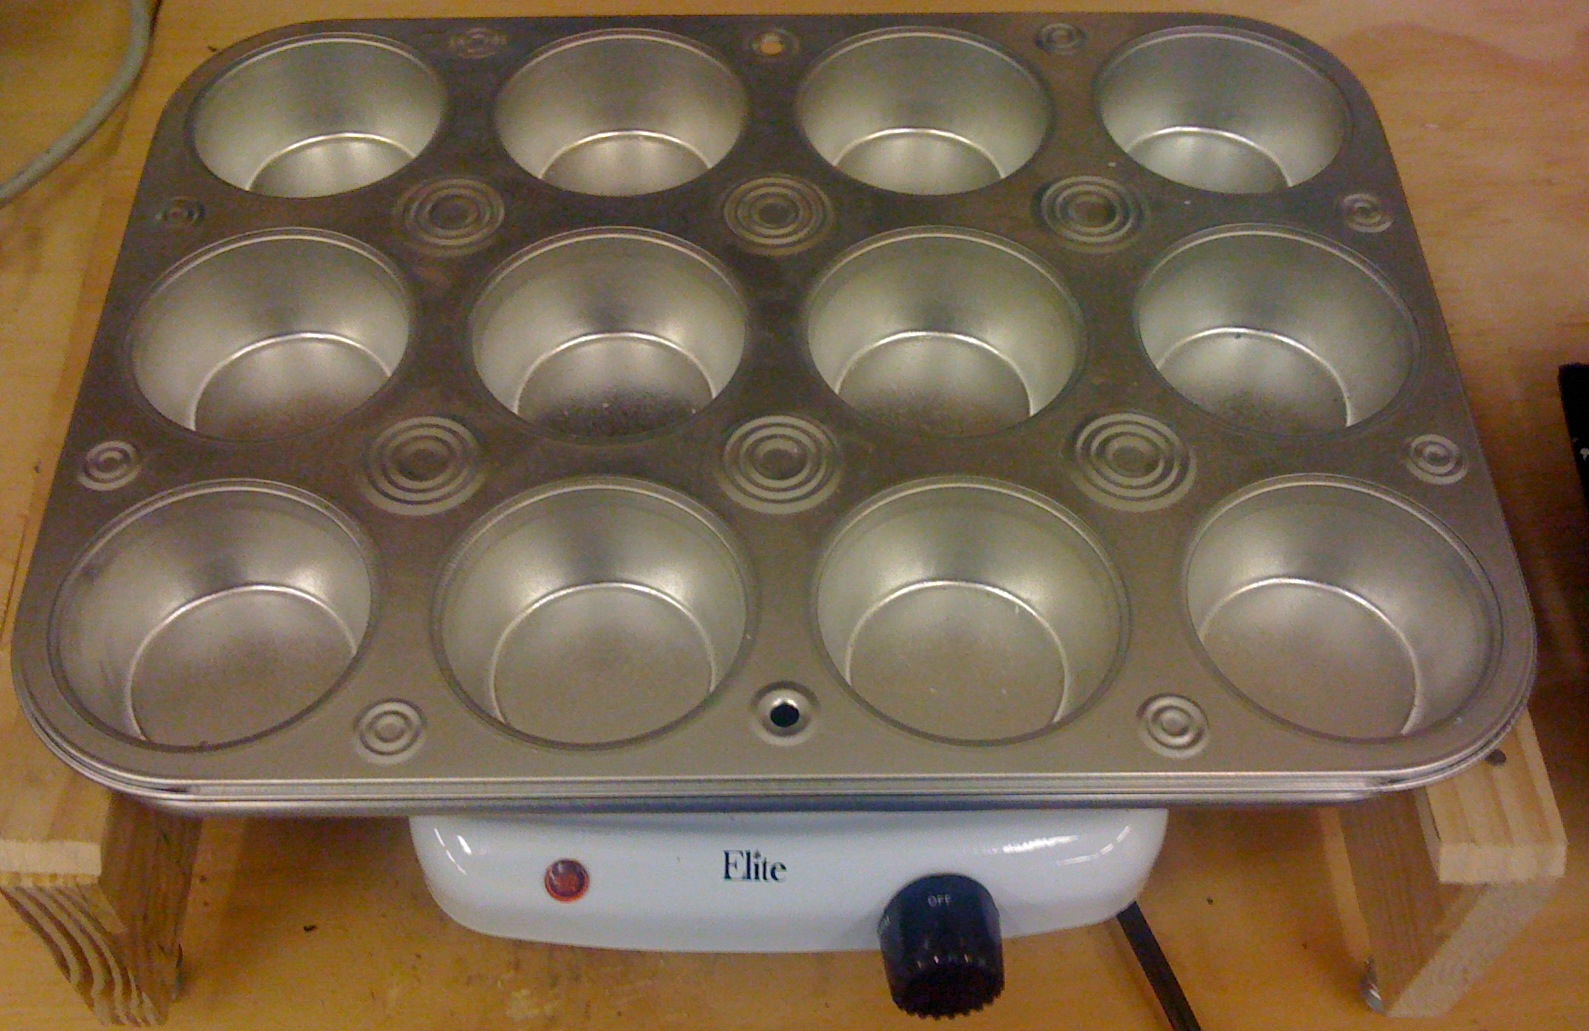
1 aluminum muffin tin (optional)
1 three foot long piece of 1x4 lumber.
4 wood screws 1 & 1/2 inches long.
4 carriage bolts 1/4 20 by 1 inch.
4 T-nuts 1/4 20 threaded.
Wood glue
******************************************************************
Directions:
Measure and cut a piece of 1x4 lumber to be the back support. Hold a second piece of 1x4 lumber at right angle to form a butt joint. The rim of the aluminum baker's sheet should rest in the corner on top of these pieces of wood. Cut off the short piece at 10 inches. Trim the long piece so that a second 10 inch short piece may be added on the opposite side of the other short piece to support the rim in the corner. Leave the front long side open.
Use wood glue and wood screws to connect the 10 inch side supports to the longer back support. Secure two screws on each board. Place on a flat surface and use a try square to be certain the supports are square and level with each other piece. I always pre-drill a hole slightly smaller than the wood screw diameter to make it easier to turn the screws without splitting the wood.
Next, use a 3/8 inch drill bit to drill holes in the bottom of the wood frame 1 & 1/2 inches deep in the 1/4 lumber in the four corners about an inch from the actual corners. These holes will receive the T-nuts which are hammered into position. Thread the carriage bolts into the T-nuts, and adjust for the desired distance from the hot plate surface to the baker's sheet. The hot plate is placed, so the temperature control is on the open side of the support frame. The baker's sheet rests on the wood frame.
Carriage bolt and T-Nut allows adjusting the height of the frame over the hot plate.
Note: The frame in this picture is upside down.

You can fine tune the temperature control on the hot plate relative to the distance you set on the frame by turning the carriage bolts by hand to insure that the baker's sheet palette is the right temperature. The muffin tin can be placed on the baker's sheet to provide separate compartments for colors.
The hot plate in place under the baker’s sheet with controls on the open side.

The muffin tin fits on top of the baker’s sheet. I added pieces of lattice strip on the top of the frame but this is optional.
If you already own a hot plate, you can measure the height from base to hot surface and use a different width of wood if needed.
Likewise, if you have a different-sized baker's sheet, these measures can be altered.
This project takes less than ten minutes to make and costs a lot less than buying a palette.
Other DIY projects available at my blog:
http://www.oakesart.blogspot.com
-30-
Subscribe to:
Posts (Atom)